Lien waivers can be complicated, confusing, and scary. If you don’t use them correctly, you can end up giving up more rights than you bargained for. Fortunately, California’s lien waiver rules are clearly spelled out in the law. In this guide, we’ll show you exactly how to fill out the Unconditional Waiver and Release on Progress Payment, when to use it, and what it means.
California’s mechanics lien statute provides the exact language required on each type of lien waiver form, so there’s no confusion about whether it’s valid or not. It is best practice to use their specific form on all California construction projects.
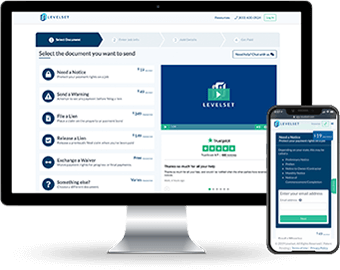
Want to execute your waiver as quickly and painlessly as possible? Send one through Levelset’s intuitive platform.
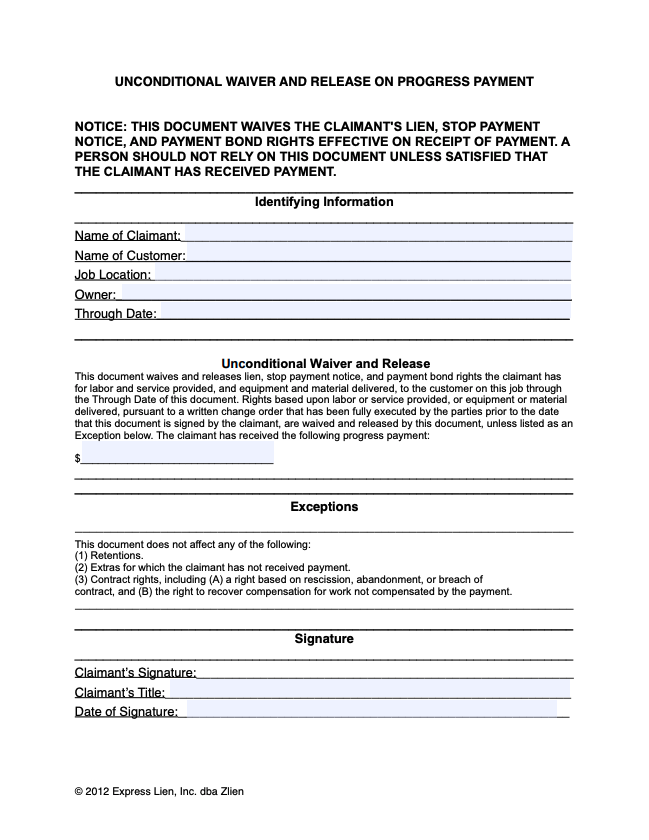
Prefer to do it yourself? Download the California Unconditional Waiver & Release on Progress Payment form, and keep reading. We’ll walk you through each part of the form.
Guide to California’s Unconditional Lien Waiver and Release on Progress Payment Form
A progress payment is an installment payment to the contractor. In other words, a small partial payment on a larger contract that is proportional to the work done by the contractor actually performed during the payment period.
If you’re exchanging a progress payment on a construction project, you’ll have two lien waiver form choices – Conditional and Unconditional. In this post, we will illuminate the Unconditional Waiver and Release on Progress (Partial) Payment.
The Unconditional Waiver and Release on Progress Payment form is used when the claimant is required to sign a waiver to induce a payment and affirms in the waiver that the payment has been received. Essentially, with this form you are asserting that payment is in hand.

Get the form
Download the Unconditional Waiver and Release on Progress Payment form, prepared by construction attorneys to meet the statutory requirements.
How to Fill Out a California Waiver and Release Form
1. Name of Claimant
This is the name the party receiving the payment, and the party who will ultimately sign the lien waiver document. Remember to identify the name of this party correctly. This sounds simple and straight-forward, but it’s very common to write the name of companies incorrectly, to miss designations like Inc., LLC, etc., or to refer to DBAs incorrectly.
2. Name of Customer
This is the name of the party who hired the “Name of the Claimant,” and usually, the name of the party who will be making the payment. It is possible that the party making the payment is not the “name of customer.” For example, if a property owner (paying party) is making payment directly to a subcontractor (name of claimant). In this instance, the “name of the customer” would be the general contractor. This scenario is typical when the parties are paying with joint checks.
3. Job Location
There are a lot of very strict requirements when identifying the job location in a mechanics lien claim, but the requirements here are much more relaxed. Do the best job you can to identify the job location — which is the physical place where the work was performed or where the materials were incorporated into the project (i.e. not where the materials were shipped!). A physical address will do just fine here.
4. Owner
This field should identify the property owner(s). Again, while this is pretty straight-forward, nuances about ownership could cause confusion. Here are some suggestions in common complex ownership scenarios:
- Multiple Owners: List all of the owners
- Work done for a tenant: List the tenant and the property owner(s)
- Work managed by a construction manager: List the owners, not the mangers
- On Public Projects: List the government office that commissioned the work
- P3 Projects: Identify developers
5. Through Date
This field is very specific to “progress claim” lien waiver forms, and is very important. What you put into this field is the most consequential field you’ll complete, and that’s because it determines what is waived and what is not waived by the document. The party signing this lien waiver document is agreeing to waive their claims for all work completed on or before the date entered into this field.
Accordingly, the “progress payment” should completely compensate the waiving party for all work before on or before the date entered. Be careful that you identify the correct date (related to the work performed and paid for), and not just the date of the related payment application (which is irrelevant).
6. Amount
This is the dollar amount of the payment. If payment is being made by ACH, credit card, or something other than a check, use common sense, and just enter the amount of the payment in this field.
7. Exceptions
The Progress Payment lien waivers in California have certain things exempted from the waiver by default, which is great for the parties signing the waiver, as they don’t have to argue about these things. Retention and retainage is excepted by default, as are “extras for which the claimant has not yet been paid,” and “contract rights.” If you have anything else that should not be waived, include it in the exceptions area.
8. Claimant’s Signature
This is the signature of the individual signing the document on behalf of the claimant.
9. Claimant’s Title
This field should list the job title or role of the individual signing the document.
10. Date of Signature
This is simply the calendar date that the document is signed.
Conclusion
That’s it! Your form should be complete.
Lien waivers are often overlooked but carry significant legal consequences. Hopefully, this guide has clarified the form and its requirements.
It is important to understand the lien waiver’s significance. For more guidance, check out Levelset’s guides to the other lien waiver types in California:
- Conditional Lien Waiver and Release on Progress Payment
- Conditional Waiver and Release on Final Payment
- Unconditional Lien Waiver and Release on Final Payment
![Guide To California's Unconditional Lien Waiver - Progress Payment [Free Download]](https://www.levelset.com/wp-content/uploads/2019/04/California-Lien-Waiver-Progress-Unconditional.png)


